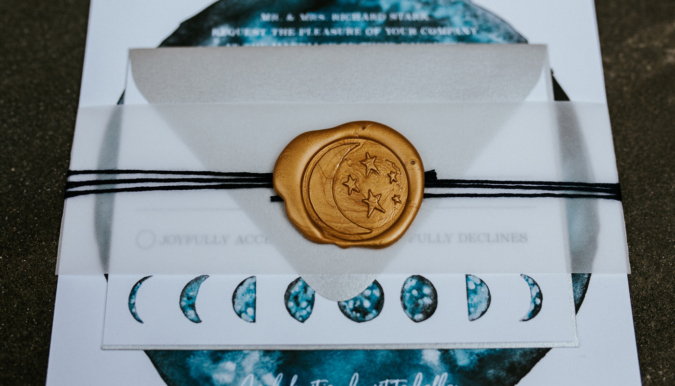
Invitation assembly often takes longer than most people realize. I recommend giving yourself at least two weeks for addressing and assembly; even longer if you have extras such as multiple inserts, belly bands, wax seals, etc. Here are my tips and tricks for a smooth invitation assembly & mail out:
1. PREPARATION
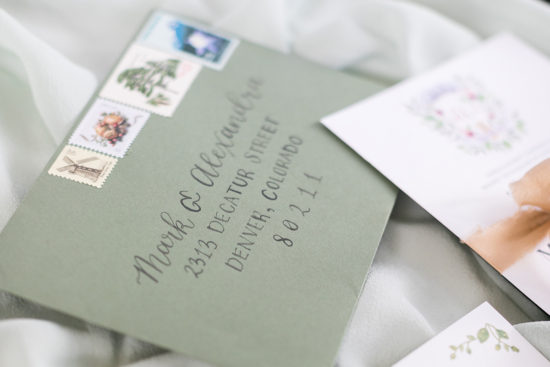
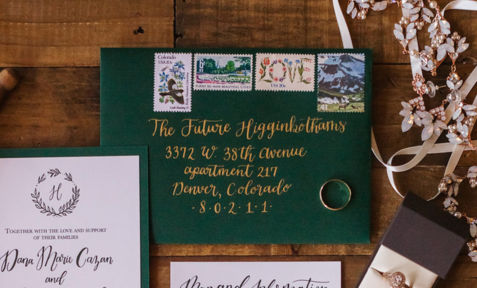
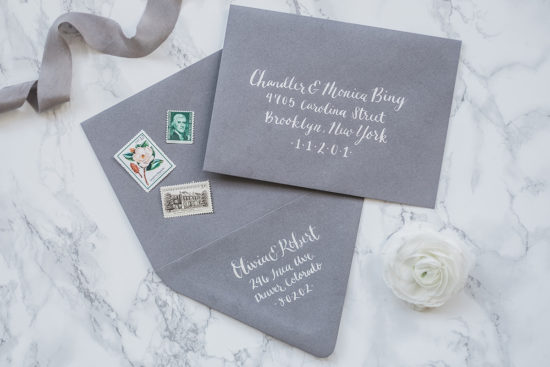
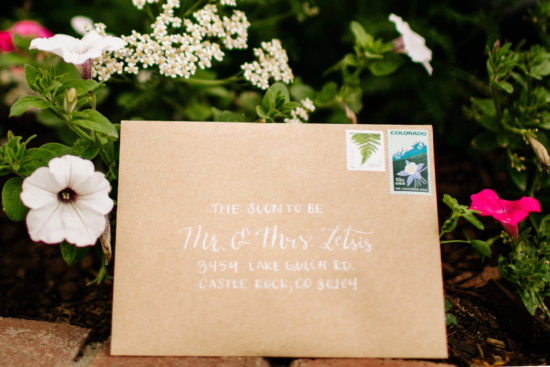
Addressing. Get your envelopes addressed before stuffing those envelopes. This includes guest addresses on the outer envelope as well as your return address on the back flap and reply envelope. Don’t let this overwhelm you – check out our 10 Tips for Addressing Your Envelopes!
Reply Postage. Make it as easy as possible for your guests to RSVP by including a stamped envelope with your invitation set.
Get Help. Some couples prefer to assemble their invitations with just the two of them while others corral a group of friends to help with the task. Either way it’s easier (and more fun) if you don’t do it alone. So crack open a bottle of wine and dive in (just don’t spill)!
2. ASSEMBLE
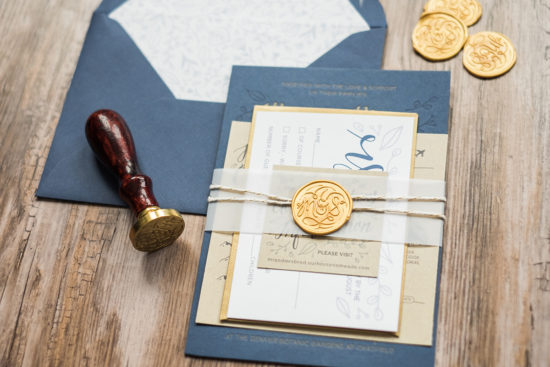
Size things up. Stack largest to smallest. Traditionally your invitation is on the bottom, followed by the reply envelope and response card on top. Inserts such as reception cards and maps should be stacked accordingly depending on their size. Learn more about the Anatomy of a Wedding Invitation Suite
To tuck or not to tuck? Some designers recommend tucking the RSVP card into the flap of the reply envelope, but I think this is a personal choice. Sometimes it peaks out of the envelope and is the first thing guests see, so I actually prefer to leave it un-tucked (just laid on top of the envelope); but this choice is entirely up to you!
Face Forward. Place everything in the envelope so that the text is facing outward. This way your guests will be able to see the design and start reading the invitation as they take it out. *If using an inner and outer envelope: put the unsealed inner envelope inside the outer envelope with the guests’ names facing outward.
Don’t lick! Dreading licking to seal 100 or more envelopes? My favorite trick for invitation assembly is using a small paint brush to seal your envelopes. Simply dampen the brush (don’t get it too wet or you risk ruining your beautiful invitation suite!) and run it along the gummed edge. Easy!
3. POSTAGE
Don’t guess. Bring an assembled invitation set with an envelope and all inserts (reply, maps, etc.) to the post office and have them calculate what postage will be needed. Inserts do increase postage, so please keep that in mind when you are deciding what all to include with your invitation suite.
Hand-Processed/ Hand-Canceled for the win! Machines at the post office only process a certain range of envelope sizes and thicknesses. If your envelope is large, square, or too heavy, you will be required to pay a fee per envelope to have them processed by hand rather than machine. Even if your suite doesn’t meet this criteria, we actually always recommend paying the extra fee to have them hand-canceled. This guarantees that the beautiful invitations you’ve worked so hard on will be sorted by a person instead of a machine – limiting the possibility of the envelopes getting bent or dirtied.
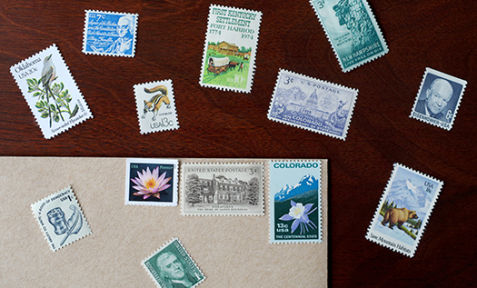
Buy stamps. Keep in mind there is always a larger selection of stamps available online! In addition to what the post office offers your can complete your design with custom postage from sites like Zazzle (although keep in mind the added costs). Want something different? My favorite thing right now is mixing vintage postage in with modern designs for an eclectic and unique look.
4. Mail!
Now, the exciting part! You’re ready to send those bad boys out into the world – finally! Mail your invitations six to eight weeks before the big day and get ready to start tracking those RSVPs. (Need to know more about when to send your wedding stationery? Check out our Custom Wedding Invitation Timeline post)